Quilting 101, Lesson 6 - The quilt sandwich (Quilt Backing and Batting)
Hello again! Today, we're going to dive into the delicious world of creating a quilt sandwich! It's a crucial step in quilt-making that brings together the quilt top, batting, and backing. So, grab your podcast or playlist, and let's get started! A quick note- this tutorial only covers spray basting - if you are looking for a good pin basting tutorial, Suzy Quilts has a great tutorial.
What you'll need:
Quilt top: This is the star of the show! It's the pieced part of your quilt, showcasing your artistic flair- you can find more details about making a quilt top here. Ensure it's pressed nice and flat before moving on to the sandwiching process.
Quilt batting: The batting is the fluffy layer sandwiched between the quilt top and backing, adding warmth and giving your quilt its cosy feel .Batting comes in various fibres like cotton, polyester, wool, and blends. Choose based on your preferences, as each type has its own pros and cons.
Bamboo: This is my personal favourite. It has beautiful drape, is slightly warmer than cotton and is not too badly priced (comparable to cotton)
Cotton: Breathable and ideal for a flat, traditional look. Reasonably priced However I don’t find it’s particularly warm
Polyester: Resilient, great for high-loft quilts, and doesn't shrink much. It’s also generally the cheapest option. But, it may feel stiffer compared to cotton…and it’s not great for the environment
Wool: Warm, and provides excellent loft. It's a bit pricier but perfect for warm quilts. I have had an issue before with massive shrinkage with wool but I purchased from a farm store- if you are purchasing from a quilting shop or fabric shop, you should be fine!
Blends: Combinations of fibres offer a mix of characteristics. A cotton-poly blend is a popular choice for its balance of warmth and durability.
Quilting backing: This is the fabric that forms the back of your quilt sandwich. Choose a fabric that complements your quilt top and batting. Your backing fabric should be a few inches larger than your quilt top on all sides - As a rule of thumb, add at least 4-6 inches to each side of your quilt top for both the batting and backing.This ensures you have enough fabric for the quilting process and prevents any shrinkage surprises. The pattern should include how much you need however if you’d like to read about how to use way less quilt backing fabric, click here.
Safety pins or basting spray: These are needed to hold the layers together. (NB: This tutorial only covers spray basting as personally I find it gives a better result and is much faster :-)
Spray Basting: This is my personal favvourite and I find I get a much better result (plus it’s way faster than pin basting). But it is more expensive as you have to buy new spray basting spray and not great for the environment. I recommend opening all your doors and windows and wearing a face mask. My favourite basting spray is 505.
Pin Basting: This is much slower process but many people love it! It’s cheaper as you only need to buy pins once and is more environmentall friendly. Curved safety pins make this way easier.
Iron- to make it nice and flat
Scissors (to cut your batting)
Optional- clamps if you decide to do table basting
Floor basting vs. table basting:
Floor Basting: This method involves spreading your layers on a clean, smooth floor. It works well for larger quilts. You can crawl around and baste as you go.
Table Basting: Suitable for smaller quilts (but can be used for larger quilts too), this method involves using a large table and means you don’t need to crawl around on t he floor. I find using clams can be super helpful for attaching your quilt to the table.- this is my preferred method
Ok now we have the basics covered, it’s time to get started!
Preparing your quilt backing
Start by making sure your quilt top is pressed nicely- this is really important for getting a good finish
Next it’s time to make your quilt backing- this usually involves sewing two lengths of fabric together (which is the easiest method) but as mentioned above, if you’d like to save yourself some fabric, go check out this tutorial which I wrote which talks about calculating how much fabric you can get away with.
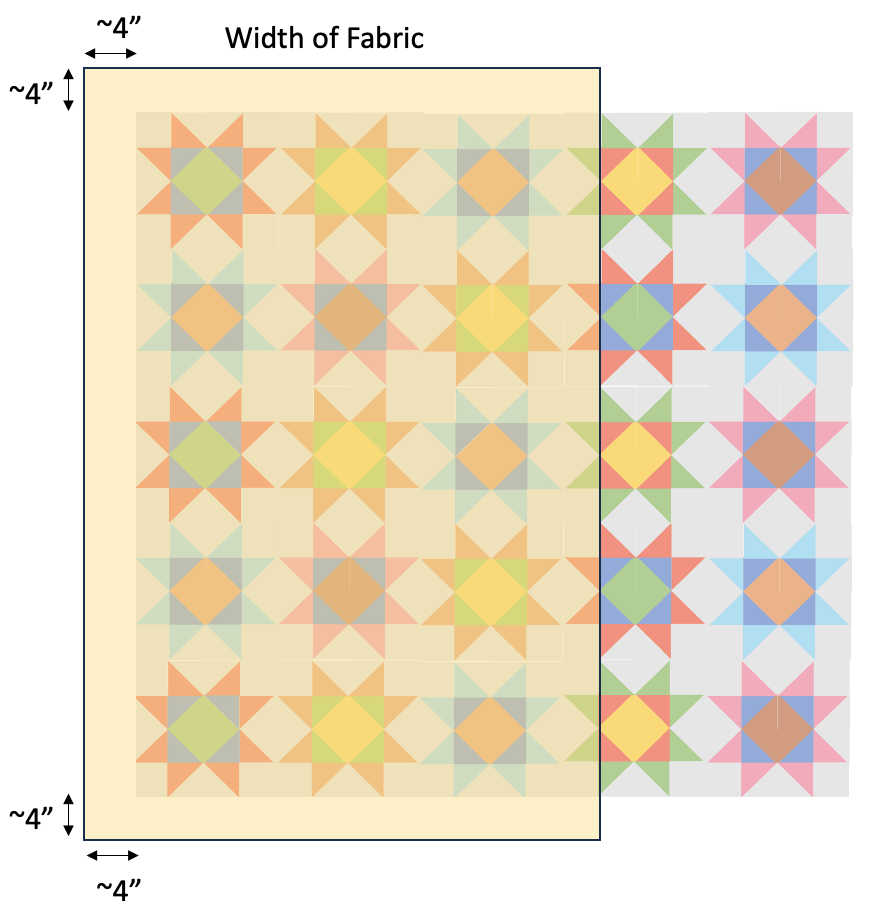
Start by laying your quilt top out either on the floor or table. Then take your backing fabric and place it on top of the quilt top to measure how much you need, lengthwise. Add about 4 inches on either end and cut to length
Then lay your second piece of backing fabric next to it as follows- make sure you have at least 4” on the right side of the quilt (plus 2” seam allowance). If you are making a really large quilt, you may need to add a third piece of fabric.
Once you’ve cut your second length of fabric to length, it’s time to attach the pieces together, using a 1” seam- this should be enough to ensure the selvage doesn’t show through but adjust accordingly.
Trim off the excess on the side (making sure you have at least 4” on each side)
Cutting your batting to size
Lay your quilt top on your batting and leave at least 6” on each side of the quilt top, cut to size.
Ok NOW we can get started!
Table Basting
This one is a tough one to draw diagrams for so I’ve put together some short video tutorials to show you how I do it - don’t be scared by the fact there are three- they only go for about a minute or so each so you’ll be a table basting expert in no time!
Floor Basting
If got a sped up video on my instagram if you want to see this in action (there aren’t any instructions, but it might be useful if you’re a visual learner) Start by clearing a space on your floor. I recommend a hard surface like tiles or floorboards. Also, it might be a good idea to give it a quick vacuum just to make sure there’s no dust (optional step only!)
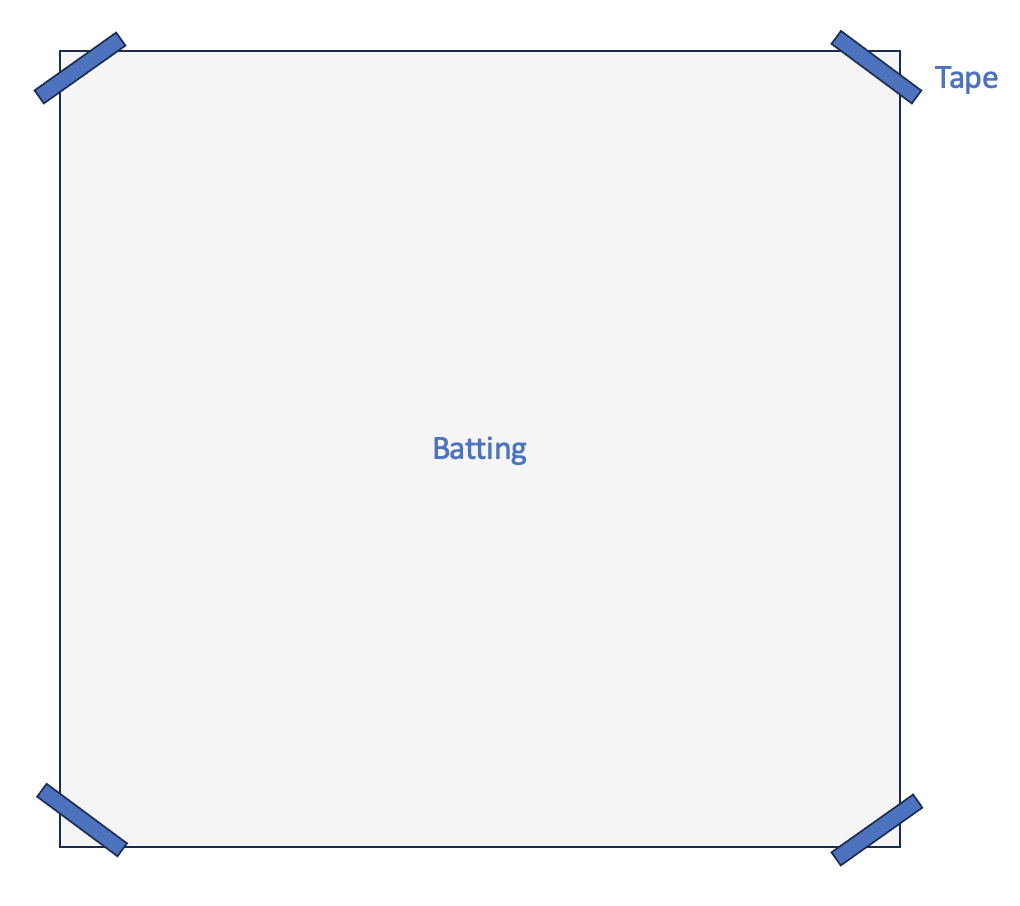
Once clear, lay out your piece of batting and attach to the floor using tape. I find a piece in each corner is enough. Make sure it’s nice and flat and pulled tight but not too tight.
Next we are going to lay out our backing fabric on top- flatten it out and make sure it’s nice and flat and get out as many creases as you can:
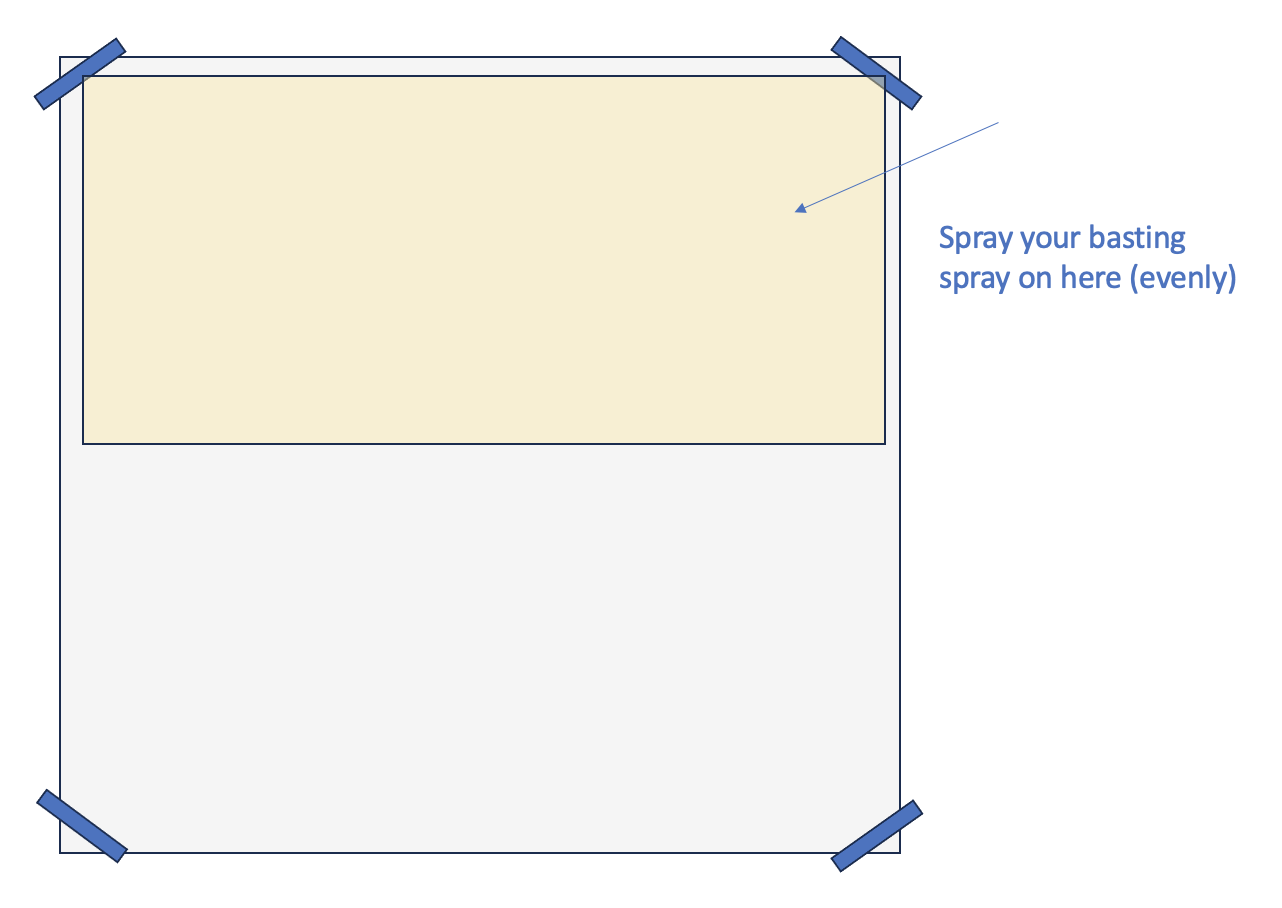
Next, fold back half of the backing fabric and spray baste evenly, directly onto the folded back piece of fabric (you’ll be spraying on the wrong side of the fabric)
Then bring the fabric back up on top of the batting and using your hands make sure it’s nice and tight and flat. Be firm and confident with the fabric to avoid as many creases as possible. Press out any creases with your hands. Then get your iron and press it nice and flat, going from the centre out (just the top half at this stage as that’s the only part that’s spray basted).
Next, fold up the bottom half and spray baste this section
Then bring the fabric back up on top of the batting and using your hands make sure it’s nice and tight and flat. Be firm and confident with the fabric to avoid as many creases as possible. Press out any creases with your hands. Then get your iron and press it nice and flat, going from the centre out (just the top half at this stage as that’s the only part that’s spray basted).
Phew, we’ve attached our quilt backing- we are half way there!
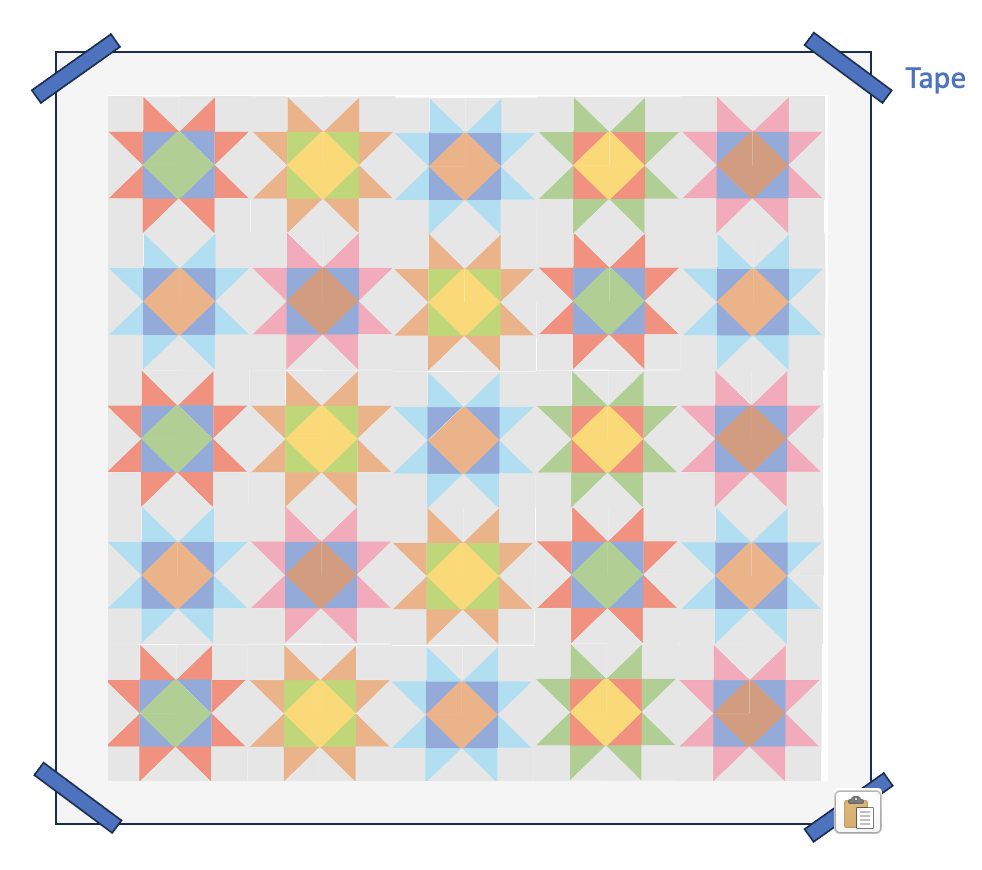
Now take your batting and backing fabric combo and carefully remove the tape. Flip it over so the batting is on the top side and reattach to the floor using more tape (in this image, the quilt backing is on the other side):
Next, lay out your quilt top on top of the batting making sure it’s (somewhat) centred- it doesn’t have to be perfect, just make sure you have batting on each of the sides. Smooth it out as much as possible using your hands to make sure it’s flat with no creases
Now we are going to do exactly what we did for the quilt backing in terms of folding half of the quilt top back, spray basting, folding it back up, pressing with the iron and repeating. And that’s it, your quilt sandwich is done!
Now that you have your quilt sandwich ready, you can quilt it to your heart's content! Whether you're machine quilting or hand quilting, remember that the quilt sandwich is the foundation of your quilt, so take your time and enjoy the process.


