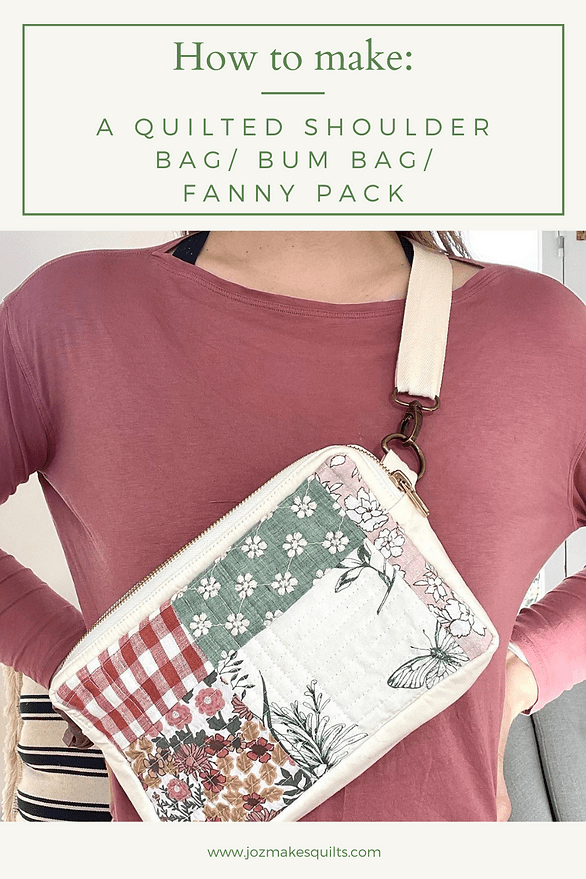
How to make: a quilted bum bag/shoulder bag/fanny pack (or whatever name you call it)
You know you are getting old when you start to see fashions that you have seen before coming back into style- case in point- the bum bag. I initially rolled my eyes when I saw people starting to wear these (albeit in a much more stylish way than the 90's) but I soon gave in to the trend and bought my own and LOVE it- it's so useful! So now it's time to make my own- and a quilted one!
I looked at a LOT of tutorials for inspiration and ended up making a sort of hybrid version with some of my own twists thrown in- I hope you find this one useful!
You need:
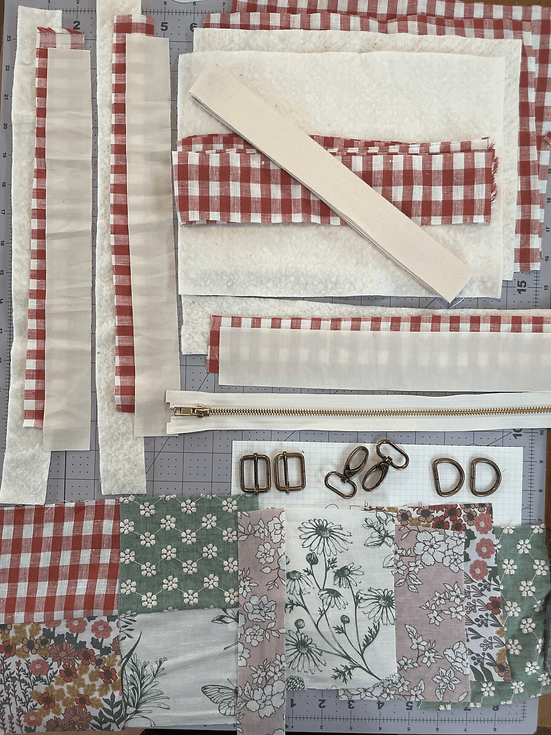
Scraps of fabric for the outer- at least equivalent to a fat quarter
1/3 yard fabric for the lining
Batting (scraps and off cuts should be enough)
14" zip (NB: the final zip size is 13" but I recommend purchasing a larger one- perhaps even 16" or so- this will make it easier to insert as you can move the zip pull down and it won't get in the way of your sewing machine foot).
2 x D clips
1 x slide adjuster (see photo below- these seem to go by a lot of different names) (Update: You only need one even though the picture has two:-)
2 x swivel clip / clasp (see photo below- these also seem to go by a lot of different names)
1.25 yards drill cotton tape or other thing ribbon/ tape (these is what you will sling over your shoulder/ around your waist
For the side adjuster, swivel clip and D clips, I purchased this pack from Amazon*
Tools:
Sewing machine
Thread
Iron
Basting spray/ basting pins (I'd recommend spray over pins for this project- pins might get in the way given the pieces are so small!)
Rotary cutter/ scissors
Iron
Needle
Pins or clips
Let's get started!
As a rough overview, we are going to make four pieces that come together towards the end:
Bag front- outer and lining
Bag back - outer and lining
Side of bag- top with zip
Side of bag- bottom with no zip
First we will cut all our pieces.
Cutting
Bag front and back- outer
We will start by making the scrappy/ fabric that is going on the outside of our bag. If you are just using one fabric, you can skip this step.
We need two "blocks" (one for the front of the bag and one for the back) that are at least 9.5" x 6" -whether you use one piece of fabric this size, or join together multiple pieces or use an existing block you may have in your stash is up to you!
I used four rectangles on my front piece that were each 4.5" x 4.5" sewn together using 1/4" seams with a piece on the side that was 8.5" x 2". As you can see, my pieces are quite a big bigger which allowed me plenty of space to trim to the final size.
For my back piece, I used four pieces that were each about 4.5" x 6", sewn together using 1/4" seams.
Bag front and back- batting and lining
Cut (2) pieces of batting that are 10.5X x 7.5" (you can use any batting you have- I used cotton batting)
Cut (2) pieces of your lining fabric that are approximately 10.5" x 7.5" (I used gingham)
Side of bag- top half with zipper
Cut (2) pieces fabric for the outer- 13" x 2" (I used cream)
Cut (2) pieces of batting- 13" x 2"
Cut (2) pieces of lining fabric- 13" x 2" each (I used gingham)
Side of bag- bottom half
Cut (1) piece fabric for the outer- 16.5" x 2" (I used cream)
Cut (1) batting - 16.5" x 2"
Cut (1) fabric for the lining- 16.5' x 2" (I used gingham)
Now that we have cut all our pieces, it's time to make our bag!
Making
Bag front and back
Once you have your pieces sewn together to make a fabric patch that is at least 10.5" x 7", it's time to make our quilt sandwich. Baste together your patchwork top with batting and lining fabric using either basting spray or pins.
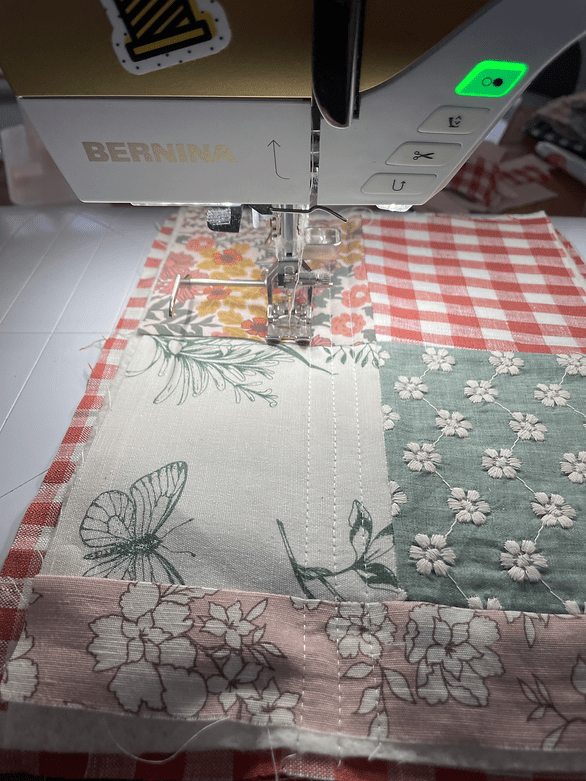
Quilt as desired. I did grid quilting using the edge of my sewing machine foot as a guide.
Once quilted, cut to size.- it should be 9.5" x 6" .
Repeat for your bag back using the instructions above. You will have two pieces the same size (9.5" x 6"). Set aside for now
Side of bag- top half
Now it's time to sew in our zip- eeek! (well at least that's what I said)- but don't worry. this method means zips aren't nearly as scary as you might think.
First we are going to start by basting and quilting the two strips that go either side of the zip. For mine, I used cream on the outside. We are not adding the bottom layer as you would in a typical quilt sandwich, just the top layer (cream) and batting.
Take your (2) strips that are 2" x 13" and baste to your two batting strips of the same size. Quilt as desired (you don't need to quilt this step given it's such a small piece so this step is optional- I didn't)
Once complete, take one lining piece that is 2" x 13", one quilted piece and your zip. Align:
Your quilted piece with the edge of the zip, with your batting facing upwards (so your top layer facing the top of the zip
Your lining piece right side facing the bottom of the zip
Effectively you'll have four layers aligned - batting, fabric, zip, lining
Pin together
Wow, that's a confusing sentence- let me show you a photo to make that make sense!
The fabric is flipped back so you can see all the layers :-)
Using a 1/4" seam, sew together each of these layers- go slowly! You may want to use your zip foot if you have one but as long as you keep your zip pull out the way, you can probably get away without using it (I used my 1/4" seam foot). As noted above, although we only need a 13" zip, I recommend getting one that's a bit longer- maybe 16" and that way you can keep the zip pull right out of the way !
Once you've sewn along the entire strip, fold your pieces back and press flat with your iron
Now we are going to top stitch down this piece. I did this by aligning the centre of my sewing machine foot with the edge:
See how the centre edge of my foot aligns with the edge of the fabric?
Go slowly on this step (even I did, and I'm the impatient quilter!)
Repeat the same steps with the other side.
Next we are going to trim our zipper piece down to size- using your ruler, trim to make this piece 2" x 13". Make sure the zip is in the middle so both sides are even.
See how the 1" line lines up with the zip?
I think that's the hardest part of this whole bag- but it wasn't too bad was it?
Next we are going to sew the other pieces to the zipper piece so we have a "circle" that goes around our two bag pieces. This might might seem a little confusing but its very straightforward (I promise) and it means all your seams are nicely hidden!
Take the following pieces:
(1) piece 2" x 16.5" outer piece (I used cream)
(1) piece 2" x 16.5" piece batting
(1) piece 2" x 16.5" piece lining (I used gingham)
From left to right, we have our lining piece, our batting and outer piece (middle) and completed zip piece (right)
Baste the outer piece to your batting piece leaving about 1/2" on either end not basted and quilt as desired (optional)
Now, take the outer/batting piece and your lining piece and align this with the edge of our zip piece: The top of our zip piece and top of our outer/ lining piece will go right sides together, then the lining piece is going to go to the bottom of the zipper piece, right sides together. Sew using 1/4" seam.
This is what it will look like after you've sewn the three layers together and flipped it back
Repeat on the other side.
Press all the pieces together- you may want to baste the lining piece to the batting piece just to be extra secure.
That wasn't too bad was it? Now it's the final few steps- assembling the bag!
But first, we have to make our binding. Take two of your 2.25" x WOF lining strips and press in half lengthways.
Fold your zip piece in half, and your front and back bag pieces in half and mark each one using a pin- we are doing this so they are all aligned and our zip isn't wonky.
Now we are going to pin one side of the zip "circle" to the front piece, with the rough edge of the binding also aligned. Pin or clip all around to make sure it lines up perfectly.
Now very slowly. sew around using 1/4" seam. You will find it easier if you have the front piece on the bottom. When you get to the corners, stop when you are 1/4" from the edge and leave your needle down and raise your foot and shuffle the fabric. Just go slowly and don't worry if it's not perfect !
When you come to the end, fold your binding over so it overlaps with the end piece and hides the rough edge.
Before doing the same for your back piece, take (2) pieces of your cotton tape that are 3" long and thread the D rings through. Pin to your back piece with the pieces closed and using zig zag stitch, attach the pieces (make sure the zig zag stitch is close to the edge so you can't see it once the bag is sewn together.
Make sure you use the centre pin we marked before to align with the centre of your zip piece and pin around. Repeat with the binding as we did for the front piece.
And we are almost there! Hand stitch the other side of your binding closed to cover the rough edges- I know you want to finish but I promise this step is worth it! (It took me two episodes of Friends to do mine).
Take your cotton tape and cut to size- I cut mine at 1 metre (1.1 yards).
Sew one end around one of your swivel clasps with a double fold- I used a small zig zag stitch for extra length.
Now thread through your slide adjuster, and fold over the other end of the cotton tape and sew down with a double fold so the end doesn't fray and so it can't fall out of the slide adjuster.
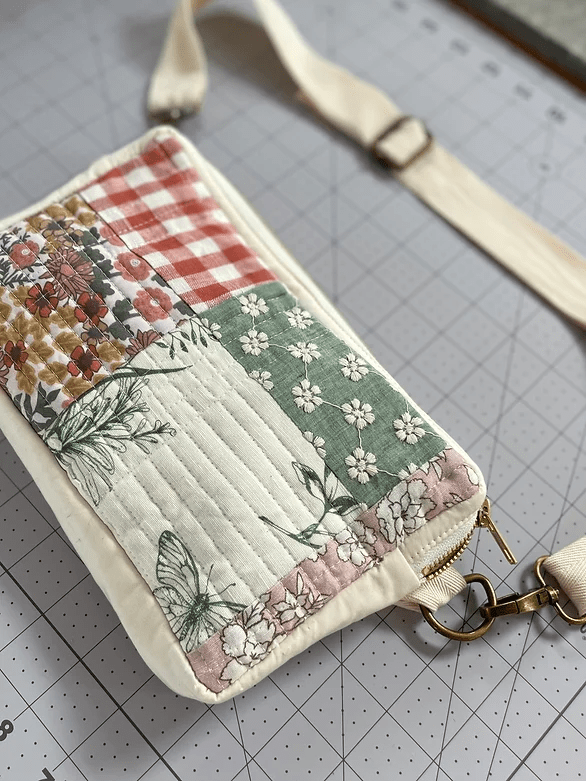
Attach your cotton tape to your bag using your swivel clasps and you are done!!!! YAY!


